WeBASE管理平台分为四个部分:节点前置,签名服务,节点管理,WeBASE管理台。
前言
<font color=#999AAA >最近经常有小伙伴问到:生产环境没有网络怎么部署FISCO BCOS以及各种中间件呢?在网上目前也找不到相关的资料,所以这里就抽空闲时间来做一下相关的教程,方便小伙伴们快速入坑。这里以centos7.5为例、其他操作系统类似,前面的章节已经离线部署的FISCO BCOS的底层,现在我们来离线部署我们的WeBase v1.4.1</font>
一、思路?
WeBASE管理平台分为四个部分:节点前置,签名服务,节点管理,WeBASE管理台。需要手动搭建以下4给部分: 1、节点前置搭建 节点前置使用Spring Boot的JAVA后台服务
.2、签名服务搭建 签名服务使用Spring Boot的JAVA后台服务
.3、节点管理搭建 节点管理使用Spring Boot的JAVA后台服务
4、WeBASE管理平台 WeBASE管理台使用框架vue-cli
需要提前准备的环境(离线安装以下环境教程点这里):
| 环境 | 版本 |
|---|---|
| Java | JDK8或以上版本 |
| MySQL | MySQL-5.6或以上版本 |
| Nginx | nginx1.6或以上版本(本文选择1.17.8,不是硬性要求) |
服务器: 10.21.36.166 (无网络) 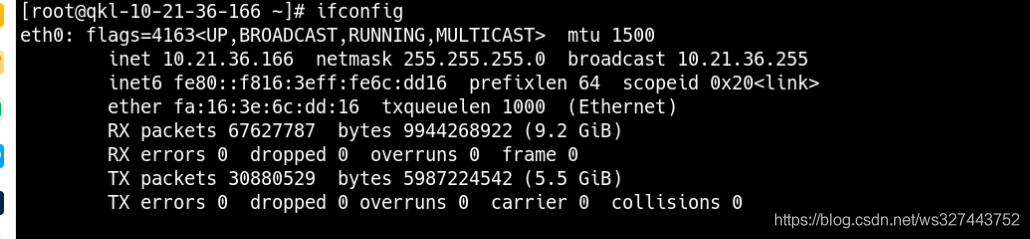
2.下载WeBase v1.4.1相关的安装包
官方CDN加速下载地址:
wget https://osp-1257653870.cos.ap-guangzhou.myqcloud.com/WeBASE/releases/download/v1.4.1/webase-front.zip wget https://osp-1257653870.cos.ap-guangzhou.myqcloud.com/WeBASE/releases/download/v1.4.1/webase-sign.zip wget https://osp-1257653870.cos.ap-guangzhou.myqcloud.com/WeBASE/releases/download/v1.4.1/webase-node-mgr.zip wget https://osp-1257653870.cos.ap-guangzhou.myqcloud.com/WeBASE/releases/download/v1.4.1/webase-web.zip彪哥整理好的:
webase1.4.1全套安装包.zip
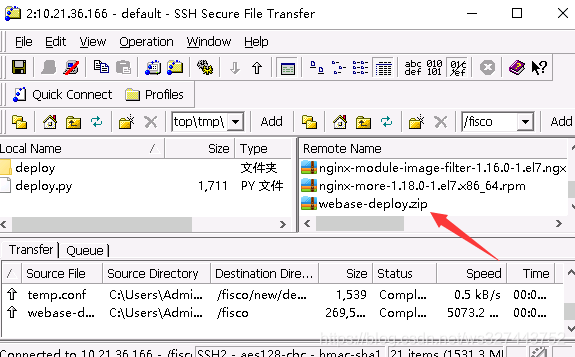
3.把WeBase v1.4.1相关的安装包上传至无网络的服务器中
4.安装WeBase v1.4.1相关的安装包
4.1解压离线包
[root@qkl-10-21-36-166 fisco]# unzip webase-deploy.zip 

4.2 配置安装WeBASE-Front
PS: 需要将节点所在目录nodes/${ip}/sdk下的ca.crt、node.crt和node.key文件拷贝到当前conf目录,供SDK与节点建立连接时使用。 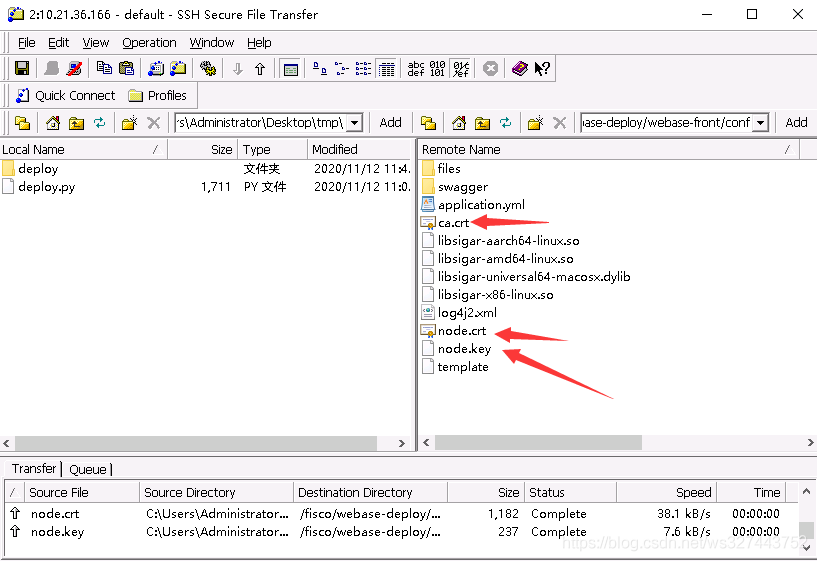 修改/webase-front/conf/application.yml的配置: nodePath改为自己的环境相关的节点路径
 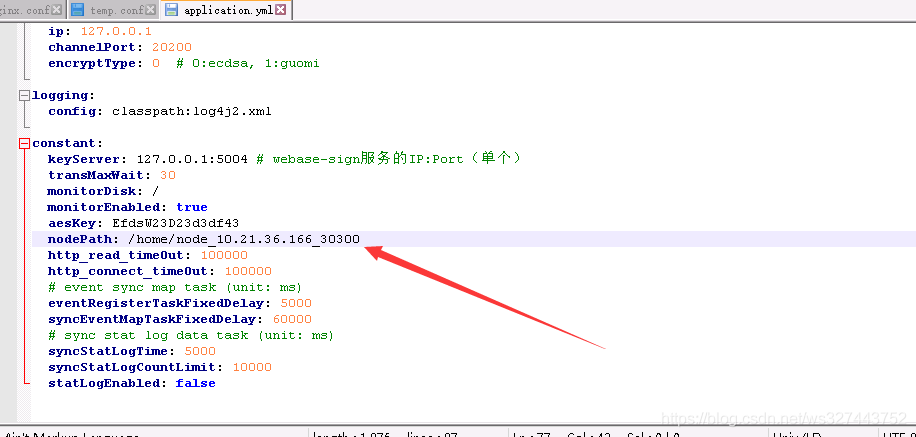 修改后的配置如下:
# server version version: v1.4.1 spring: datasource: url: jdbc:h2:file:../h2/webasefront;DB_CLOSE_ON_EXIT=FALSE databaseName: db driverClassName: org.h2.Driver serverName: username: password: jpa: database-platform: org.hibernate.dialect.H2Dialect database: H2 openInView: false show_sql: false generate-ddl: true hibernate: ddl-auto: update naming-strategy: org.hibernate.cfg.EJB3NamingStrategy session: events: log: false properties: hibernate.cache.use_query_cache: false hibernate.generate_statistics: false h2: console: enabled: true path: /console settings: web-allow-others: false trace: true rabbitmq: host: 127.0.0.1 port: 5672 username: password: virtual-host: publisher-confirm: true ssl: enabled: false http: multipart: max-request-size: 30MB # request max size max-file-size: 20MB # single file size server: port: 5002 context-path: /WeBASE-Front connection-timeout: 30000 tomcat: max-threads: 200 max-connections: 10000 sdk: orgName: orgTest corePoolSize: 50 maxPoolSize: 100 queueCapacity: 100 timeout: 10000 keepAlive: 60 ip: 10.21.36.166 channelPort: 20200 encryptType: 0 # 0:ecdsa, 1:guomi logging: config: classpath:log4j2.xml constant: keyServer: 10.21.36.166:5004 # webase-sign服务的IP:Port(单个) transMaxWait: 30 monitorDisk: / monitorEnabled: true aesKey: EfdsW23D23d3df43 nodePath: /home/node_10.21.36.166_30300 http_read_timeOut: 100000 http_connect_timeOut: 100000 # event sync map task (unit: ms) eventRegisterTaskFixedDelay: 5000 syncEventMapTaskFixedDelay: 60000 # sync stat log data task (unit: ms) syncStatLogTime: 5000 syncStatLogCountLimit: 10000 statLogEnabled: false // 给权限 [root@qkl-10-21-36-166 webase-front]# chmod +x *.sh // 启动 [root@qkl-10-21-36-166 webase-front]# ./start.sh =============================================================================================== Server com.webank.webase.front.Application Port 5002 ...PID(33159) [Starting]. Please check message through the log file (default path:./log/). ===============================================================================================访问服务测试:
4.3配置安装WeBASE-Sign
进入数据库控制台创建webase-sign的数据库
[root@qkl-10-21-36-166 webase-front]# mysql -uroot -p Enter password: mysql> create database webasesign; Query OK, 1 row affected (0.01 sec) 进入webase-sign的文件夹.修改conf/application.yml
server: # 本工程服务端口,端口被占用则修改 port: 5004 context-path: /WeBASE-Sign spring: datasource: # 数据库连接信息 url: jdbc:mysql://127.0.0.1:3306/webasesign?serverTimezone=GMT%2B8&useUnicode=true&characterEncoding=utf8 # 数据库用户名 username: dbUsername # 数据库密码 password: dbPassword driver-class-name: com.mysql.cj.jdbc.Driver constant: # aes加密key(16位),如启用,各互联的子系统的加密key需保持一致 aesKey: EfdsW23D23d3df43给权限,启动项目
[root@qkl-10-21-36-166 webase-deploy]# cd webase-sign/ [root@qkl-10-21-36-166 webase-sign]# ls apps conf lib start.sh status.sh stop.sh [root@qkl-10-21-36-166 webase-sign]# chmod +x *.sh [root@qkl-10-21-36-166 webase-sign]# ./start.sh =============================================================================================== Starting Server com.webank.webase.sign.Application Port 5004 ...PID(10471) [Starting]. Please check message through the log file (default path:./log/). =============================================================================================== 4.4配置安装WeBASE-Node-Manager
进入数据库控制台创建webase-node-mgr的数据库
[root@qkl-10-21-36-166 webase-front]# mysql -uroot -p Enter password: mysql> create database nodemgr; Query OK, 1 row affected (0.01 sec) 下载数据库脚本 https://download.csdn.net/download/ws327443752/13110232
把下载的脚本上传至无网络的服务器中
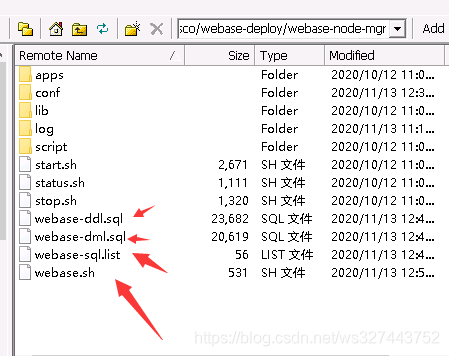
修改webase.sh文件配置如下(重点改数据库链接配置)::
#!/bin/sh echo -e "n init start...." IP=${1} PORT=${2} if [[ ! $IP || ! $PORT ]] ; then echo "Usage: sh ${0} ip port" echo "eg: sh ${0} 127.0.0.1 8501" exit 1 fi #dbUser DBUSER="root" #dbPass PASSWD="xxx" #dbName DBNAME="nodemgr" #connect to database then execute init cat webase-sql.list | mysql --user=$DBUSER --password=$PASSWD --host=$IP --database=$DBNAME --port=$PORT --default-character-set=utf8; if [ "$?" == "0" ]; then echo -e "init success... n" else echo -e "init fail... n" fi exit 给权限,并执行脚本
[root@qkl-10-21-36-166 webase-node-mgr]# chmod +x webase.sh [root@qkl-10-21-36-166 webase-node-mgr]# bash webase.sh 127.0.0.1 3306进入webase-node-mgr的文件夹.修改conf/application.yml
重点修改数据库连接配置和IP:
# server version version: v1.4.1 #server config server: port: 5001 servlet: context-path: /WeBASE-Node-Manager #mybatis config mybatis: configuration: map-underscore-to-camel-case: true typeAliasesPackage: com.webank.webase.node.mgr mapperLocations: classpath:mapper/*.xml # database connection configuration spring: datasource: driver-class-name: com.mysql.cj.jdbc.Driver url: jdbc:mysql://127.0.0.1:3306/nodemgr?serverTimezone=GMT%2B8&useUnicode=true&characterEncoding=utf-8&zeroDateTimeBehavior=convertToNull username: "root" password: "xxxxxxxxxxxx" initialSize: 10 minIdle: 5 maxActive: 30 aop: proxy-target-class: true #log config logging: config: classpath:log/log4j2.xml level: com.webank.webase.node.mgr: info #constants constant: ###http request # login's authorization isUseSecurity: true # verification code expire time (s) verificationCodeMaxAge: 300 # if disabled as false enableVerificationCode: true # verification code solid value, only when enableVerificationCode is false works verificationCodeValue: "8888" # auth token code expire time (s) authTokenMaxAge: 1800 ignoreCheckFront: /account/login,/account/pictureCheckCode,/login,/user/privateKey,/front/new,/front/find,,/group/generate,/group/start ###front http request frontUrl: http://%1s:%2d/WeBASE-Front/%3s httpTimeOut: 5000 contractDeployTimeOut: 30000 isPrivateKeyEncrypt: true maxRequestFail: 3 sleepWhenHttpMaxFail: 60000 ###common developerModeEnable: false isDeleteInfo: true transRetainMax: 10000 deleteInfoCron: "0 0/1 * * * ?" statisticsTransDailyCron: "0 0/1 * * * ?" resetGroupListCycle: 600000 groupInvalidGrayscaleValue: 1M # y:year, M:month, d:day of month, h:hour, m:minute, n:forever valid notSupportFrontIp: ###block info (pulling data from chain) isBlockPullFromZero: false pullBlockInitCnts: 1000 pullBlockSleepTime: 200 pullBlockTaskFixedDelay: 30000 blockRetainMax: 10000 ###transaction monitor transMonitorTaskFixedRate: 60000 #How long does it take to start the next task after the end (second) analysisSleepTime: 200 monitorInfoRetainMax: 10000 isMonitorIgnoreUser: false isMonitorIgnoreContract: false monitorUnusualMaxCount: 20 ###alert mail monitor task interval: 5mins unit: ms auditMonitorTaskFixedDelay: 300000 nodeStatusMonitorTaskFixedDelay: 60000 #must larger than @pullBlockTaskFixedDelay certMonitorTaskFixedDelay: 300000 permitUrlArray: /account/login,/account/pictureCheckCode,/login,/user/privateKey/**,/encrypt,/version,/front/refresh #### 1.4.0 visual deploy #### deployType 部署方式: # 0, 先使用 build_chain.sh 部署链并启用 WeBASE-Front 服务,然后手动添加前置; # 1, 使用可视化部署, 需要参考WeBASE文档填写下面参数 deployType: 0 #### if deployType = 0, ignore below properties #### # 镜像名 dockerRepository: "fiscoorg/fisco-webase" # WeBASE-Sign 访问地址 webaseSignAddress: "10.21.36.166:5004" # 部署区块链服务的节点主机存放节点配置文件和数据的目录 rootDirOnHost: "/opt/fisco" # SSH 免密登录的账号 sshDefaultUser: root # SSH 服务的端口,默认 22 sshDefaultPort: 22 #### if deployType = 0, ignore upper properties #### sdk: # 加密类型:0: 非国密; 1: 国密 encryptType: 0 # executor config for async pulling data from chain executor: corePoolSize: 3 maxPoolSize: 10 queueSize: 50 threadNamePrefix: "node-mgr-async-" # scheduler config for sync scheduled task scheduler: poolSize: 50 threadNamePrefix: "node-mgr-task-" awaitTerminationSeconds: 600 waitForTasksToCompleteOnShutdown: true给权限,启动项目
[root@qkl-10-21-36-166 webase-deploy]# cd webase-node-mgr/ [root@qkl-10-21-36-166 webase-node-mgr]# ls apps conf lib script start.sh status.sh stop.sh [root@qkl-10-21-36-166 webase-node-mgr]# chmod +x *.sh [root@qkl-10-21-36-166 webase-node-mgr]# ./start.sh =============================================================================================== Server com.webank.webase.node.mgr.Application Port 5001 ...PID(33541) [Starting]. Please message check through the log file (default path:./log/). =============================================================================================== 4.5配置安装WeBASE-Web
WeBASE-Web是基于vue的web,所以只需配置nginx即可跑起来
PS: 因为我们的服务器已有nginx,可在原配置文件nginx.conf增加一个server:
upstream node_mgr_server{ server 10.21.36.166:5001; # 节点管理服务ip和端口 } server { listen 5000 default_server; # 前端端口(端口需要开通策略且不能被占用) server_name 10.21.36.166; # 服务器ip,也可配置为域名 location / { root /fisco/webase-deploy/webase-web; # 前端文件路径(文件需要有权限访问) index index.html index.htm; try_files $uri $uri/ /index.html =404; } include /etc/nginx/default.d/*.conf; location /mgr { proxy_pass http://node_mgr_server/; proxy_set_header Host $host; proxy_set_header X-Real-IP $remote_addr; proxy_set_header X-Forwarded-For $proxy_add_x_forwarded_for; } }检查webase 
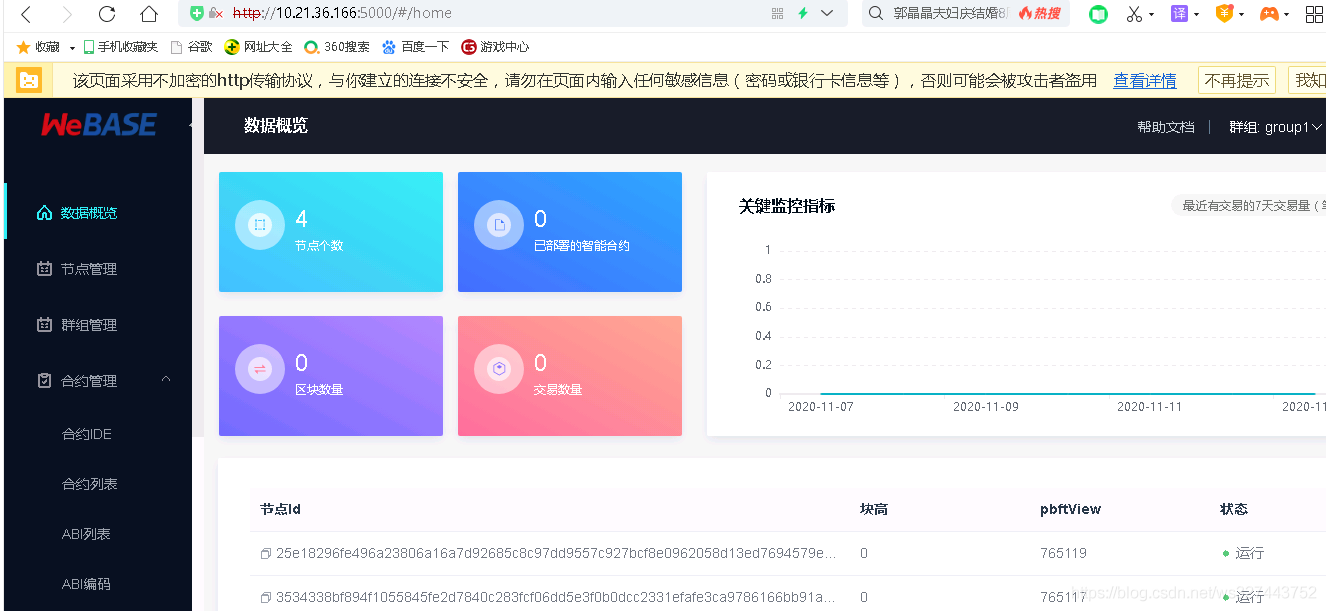
检查后发现正常,后续配置相关配置即可。本文重点是离线安装而不是配置,所以不做过多的演示! 有需要的可以参考官方的文档:https://webasedoc.readthedocs.io/zh_CN/latest/docs/WeBASE-Console-Suit/index.html#id16
总结
<font color=#999AAA > 无网络离线安装部署FISCO BCOS 中间件webase平台,还是比较简单 ,大家可以安装教程一步一步的操作。希望可以帮助有需要的小伙伴快速入坑!

-
声明:本站所有文章,如无特殊说明或标注,均为本站原创发布。任何个人或组织,在未征得本站同意时,禁止复制、盗用、采集、发布本站内容到任何网站、书籍等各类媒体平台。如若本站内容侵犯了原著者的合法权益,可联系我们进行处理。