人生苦短,我用脚手架
2.3 通过脚手架生成项目
进入
tools文件夹:cd tools2.3.1 合约配置
本示例中,使用默认的 HelloWorld 合约。实际使用过程中,可删除
contracts目录下的默认合约,并将自己的业务合约拷贝到该目录下。2.3.2 项目配置
可以在
config.ini中做项目配置,如下:### 项目名称 artifact=demo ### 组名称 group=org.example ### 所支持的合约列表,通常为空即可 selector=2.3.3 运行脚手架
chmod +x run.sh & bash run.sh运行成功后,
tools目录下会出现demo文件夹,这是自动生成的 SpringBoot 项目。
4 准备工作
假定我们的区块链节点已经启动了(搭链可见:[TODO])。
在进行具体业务逻辑开发前,我们还需要做如下几项工作:
- 部署合约
- 证书拷贝
- 补充配置文件
4.1 通过WebaseFront部署合约
(1)启动 WeBaseFront
此处我们通过 WeBaseFront 来进行部署。
简介:WeBASE-Front是和FISCO-BCOS节点配合使用的一个子系统。此分支支持FISCO-BCOS 2.0以上版本,集成web3sdk,对接口进行了封装,可通过HTTP请求和节点进行通信。另外,具备可视化控制台,可以在控制台上开发
然后访问:
http://localhost:5002/WeBASE-Front/#/contract
(2)创建测试账户
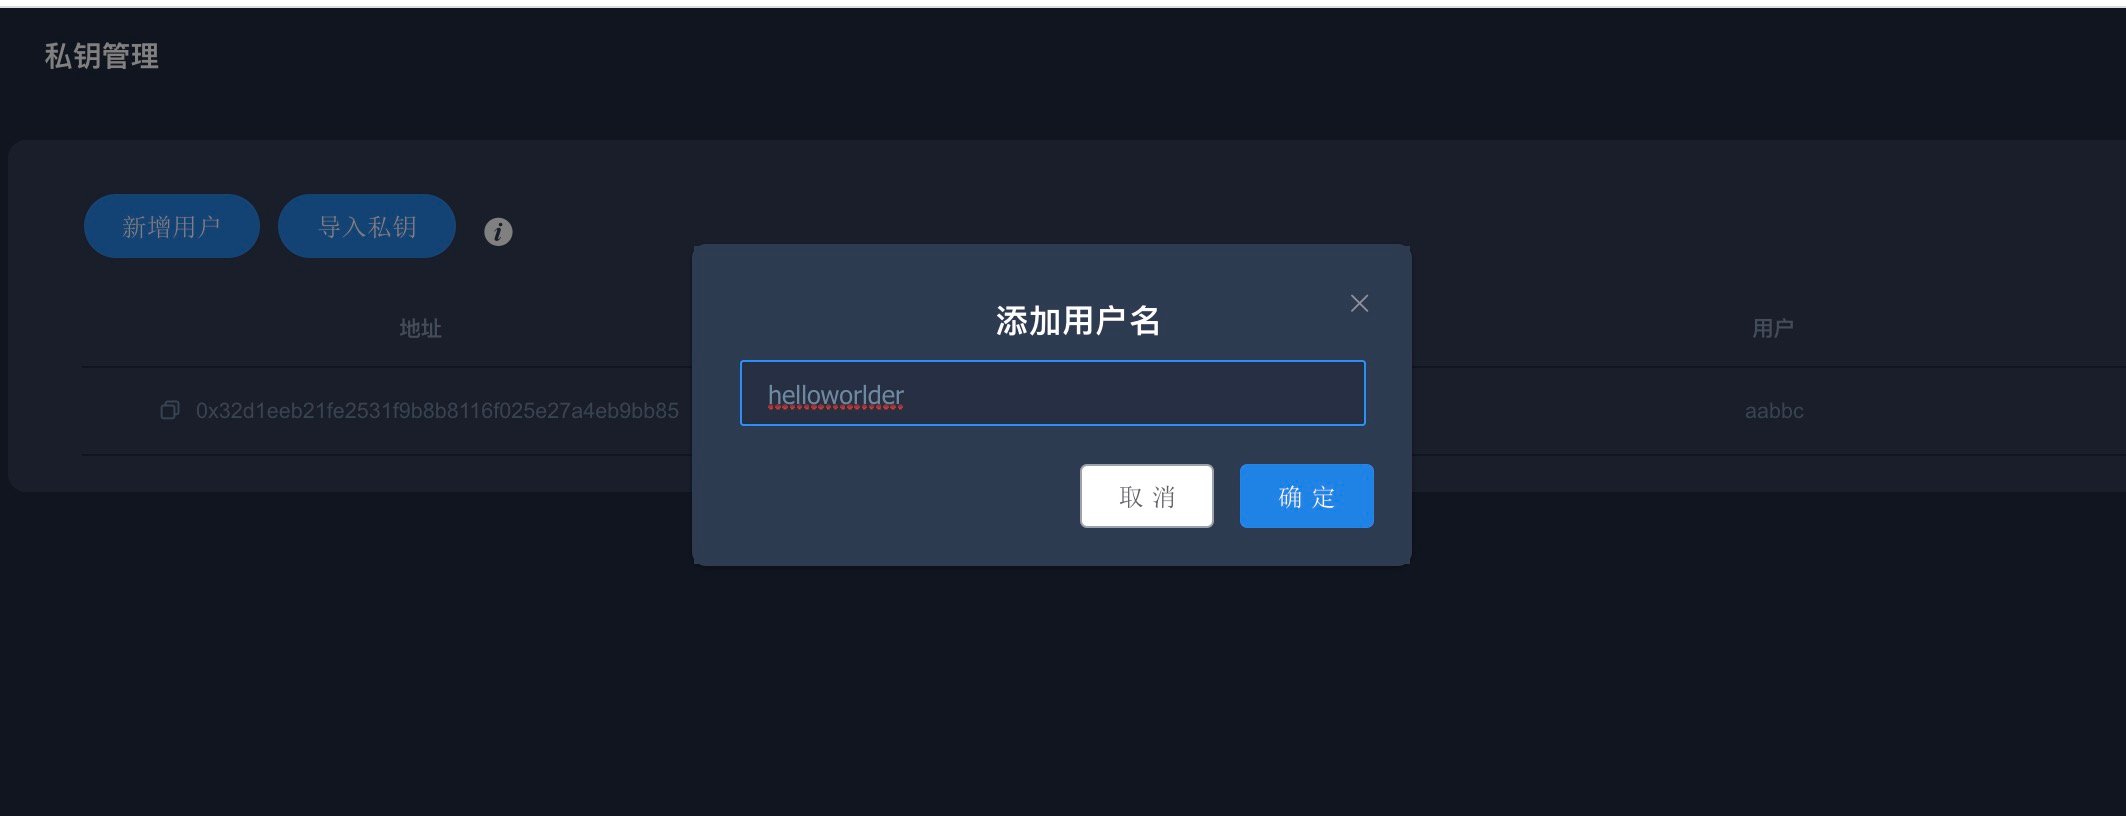
首先我们创建一个测试用户。
合约管理 > 测试用户 > 新增用户
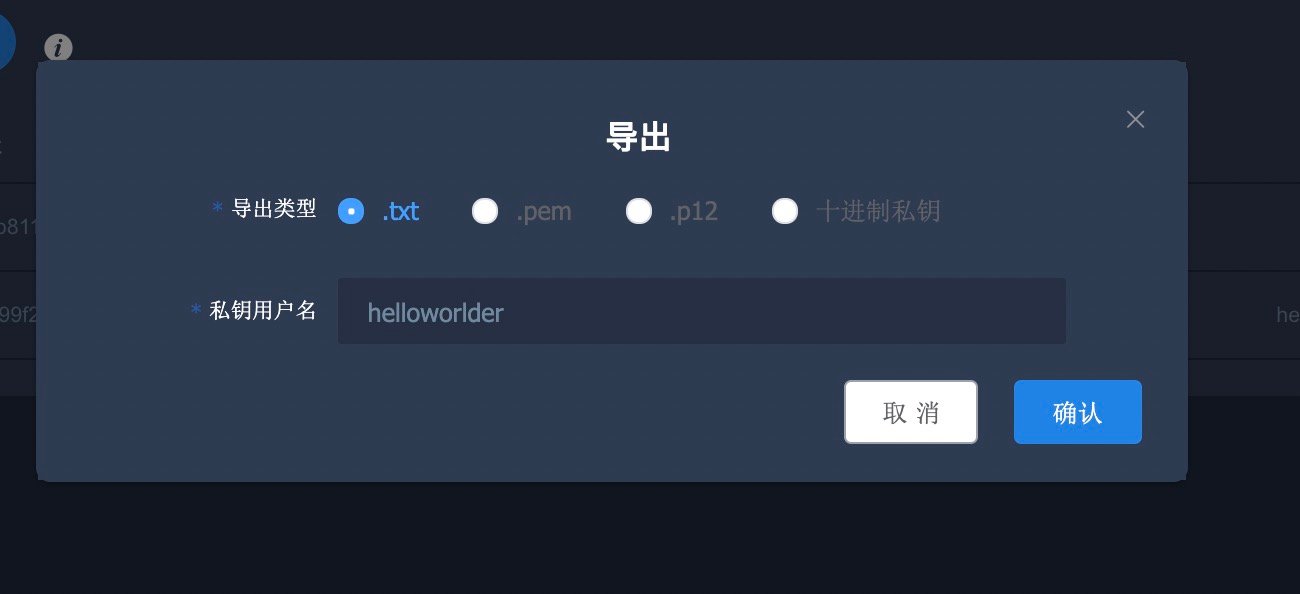
然后将其信息导出。
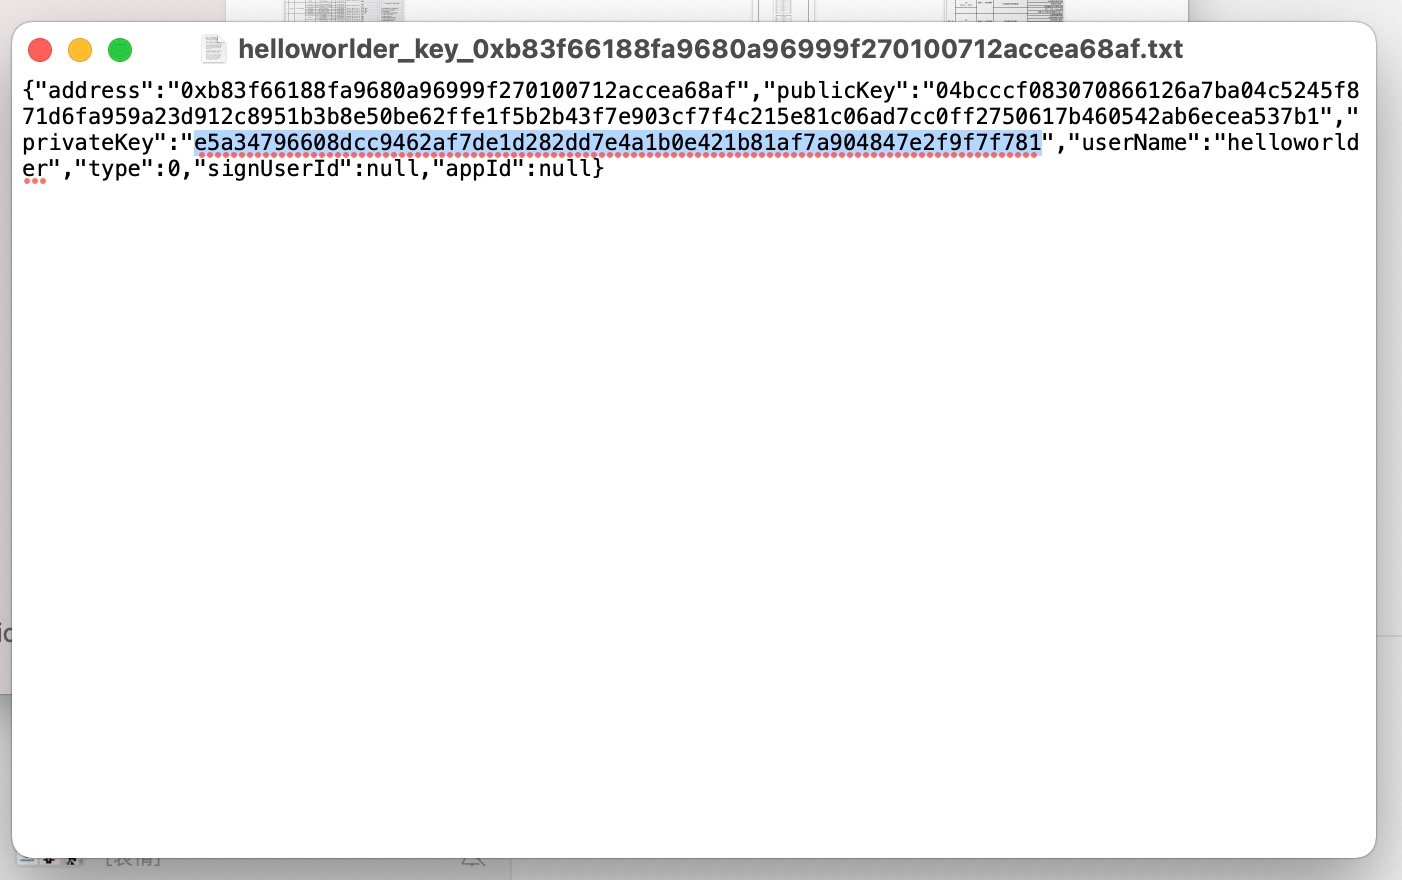
将下载的内容打开,把私钥复制出来:
(3)录入合约
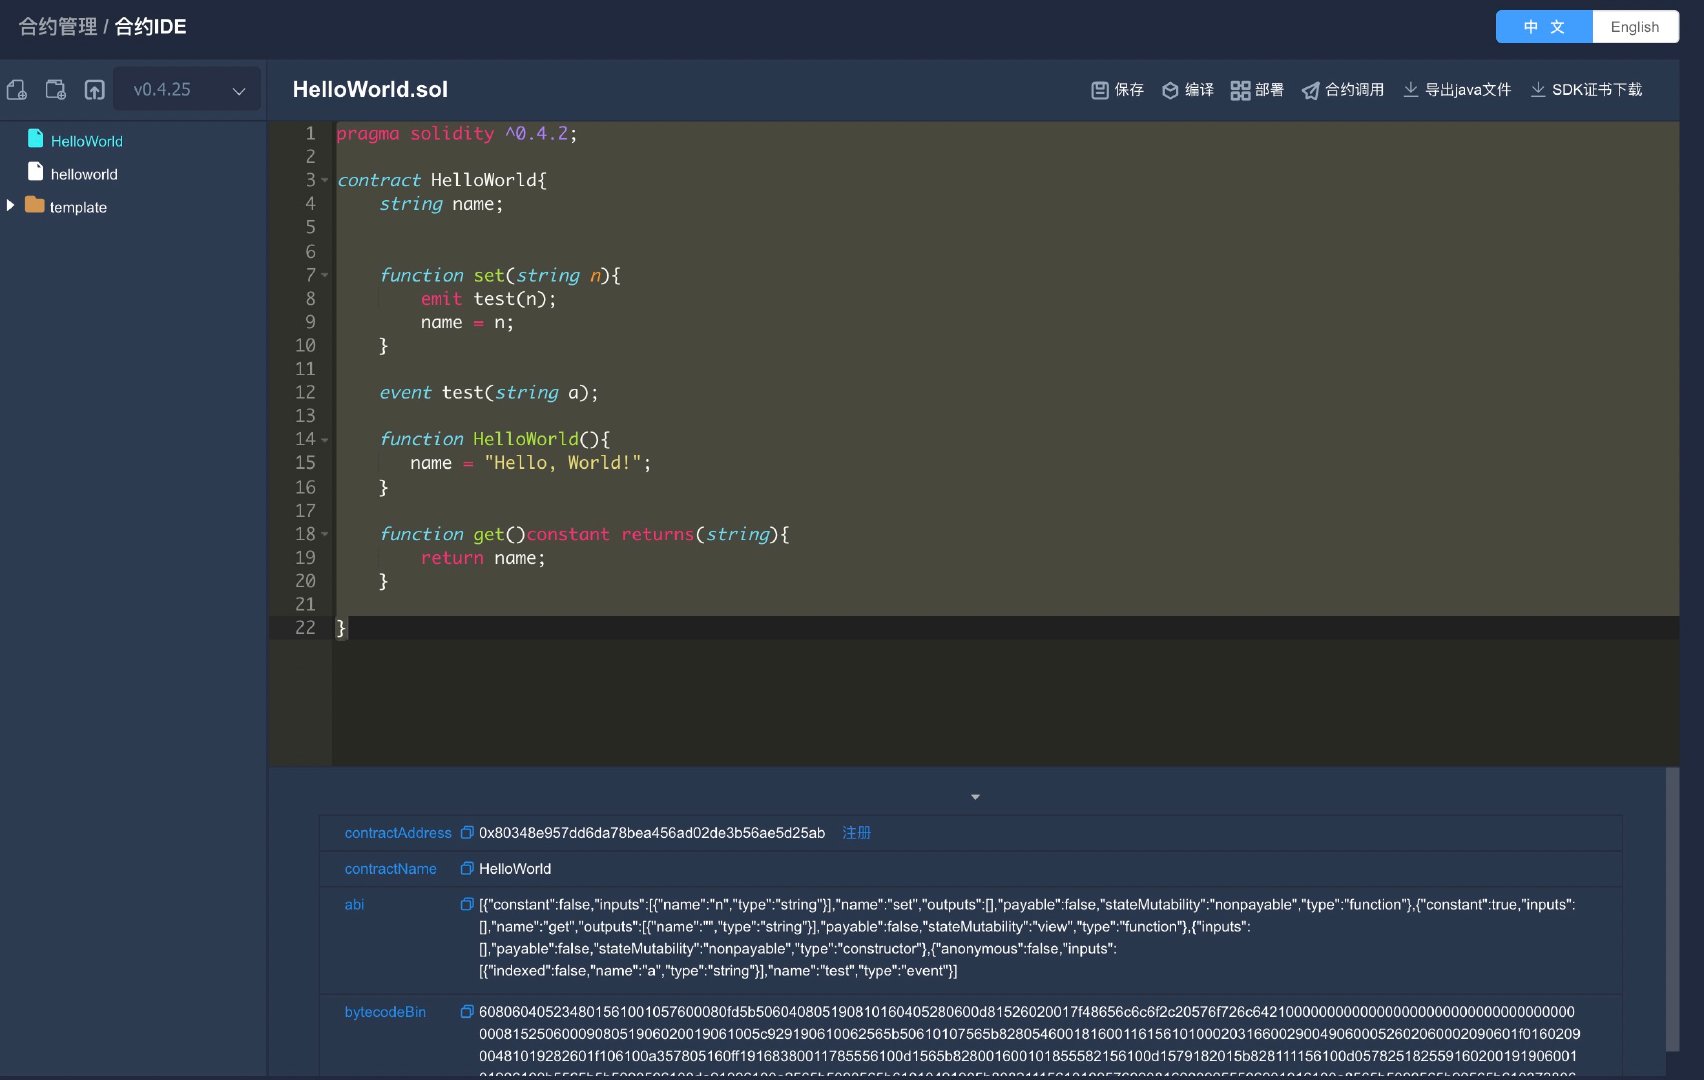
打开「合约管理 > 合约 IDE」,将刚才复制出来的合约代码通过合约IDE添加进来:
(4)保存、编译、部署
然后我们会得到合约地址(
contractAddress),我们把它复制出来。现在我们有了一个链上的HelloWorld合约,并拿到了一个账户私钥和一个合约地址。
4.2 复制证书文件到Conf目录下
conf目录位置:
/src/main/resources/conf
通过cp命令复制:
cp ~/fisco/nodes/127.0.0.1/sdk/* src/main/resources/conf/ # 此处按节点具体位置进行调整4.3 补充配置文件
要修改的地方如下所示:
### Required ### (1)此处改为节点地址+端口 system.peers=127.0.0.1:20200 ### Required system.groupId=1 ### Optional. Default will search conf,config,src/main/conf/src/main/config system.certPath=conf,config,src/main/resources/conf,src/main/resources/config ### Optional. If don't specify a random private key will be used ### (2)此处改为 4.1 中拿到的私钥 system.hexPrivateKey=e5a34796608dcc9462af7de1d282dd7e4a1b0e421b81af7a904847e2f9f7f781 ### Optional. Please fill this address if you want to use related service ### (2)此处改为 4.1 中的合约地址 system.contract.helloWorldAddress=0xf6035ce1d6b1b689e25bc2893179c00fbac2645a ### ### Springboot server config server.port=8080 server.session.timeout=60 banner.charset=UTF-8 spring.jackson.date-format=yyyy-MM-dd HH:mm:ss spring.jackson.time-zone=GMT+84.4 编译与运行
gradle build -x test进入
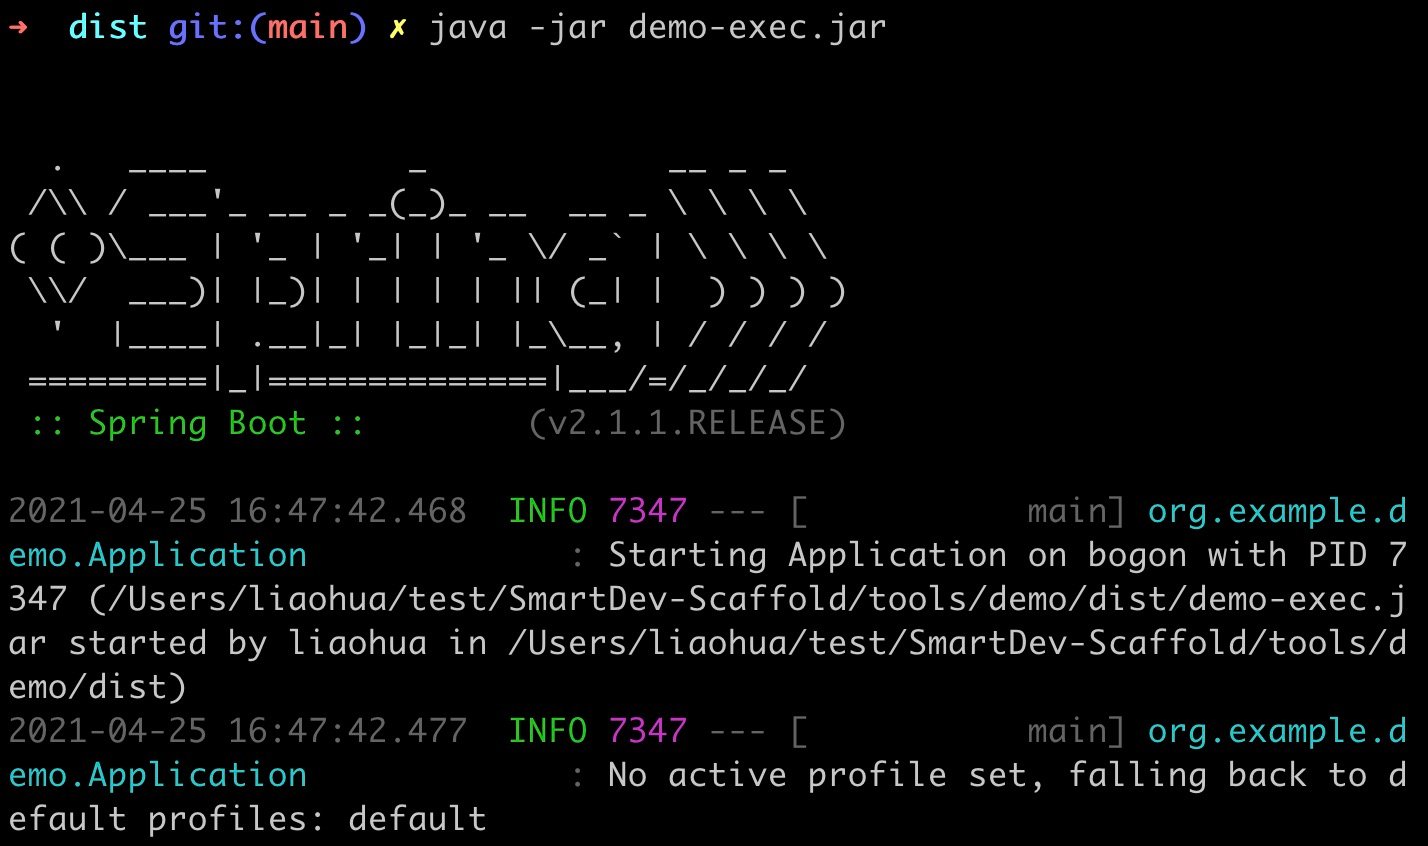
dist目录运行程序:cd dist java -jar demo-exec.jar运行成功会显示程序顺利启动:
5 添加业务逻辑
在
src/main/java/org/example/demo/service目录下新建HelloController.java文件。内容为:
package org.example.demo.controller; import org.springframework.beans.factory.annotation.Autowired; import org.springframework.core.io.InputStreamResource; import org.springframework.http.ResponseEntity; import org.springframework.web.bind.annotation.DeleteMapping; import org.springframework.web.bind.annotation.GetMapping; import org.springframework.web.bind.annotation.PathVariable; import org.springframework.web.bind.annotation.PostMapping; import org.springframework.web.bind.annotation.RequestBody; import org.springframework.web.bind.annotation.RequestMapping; import org.springframework.web.bind.annotation.RequestParam; import org.springframework.web.bind.annotation.RestController; import org.springframework.web.multipart.MultipartFile; import org.example.demo.service.HelloWorldService; import org.example.demo.model.bo.HelloWorldSetInputBO; @RestController @RequestMapping("hello") public class HelloController { @Autowired private HelloWorldService service; @GetMapping("set") public String set(@RequestParam("n") String n) throws Exception{ HelloWorldSetInputBO input = new HelloWorldSetInputBO(n); return service.set(input).getTransactionReceipt().getTransactionHash(); } @GetMapping("get") public String get() throws Exception{ return service.get().getValues(); } }这个文件的作用是创建两个url,一个是
/hello/set,设置name的值,一个是/hello/get,拿到name的值。我们重新编译项目:
gradle build -x test然后我们重新运行项目:
cd dist java -jar demo-exec.jar再打开另一个终端(或直接打开浏览器),通过 curl 命令即可通过url与智能合约进行交互:
curl http://127.0.0.1:8080/hello/get curl http://127.0.0.1:8080/hello/set?n=happy curl http://127.0.0.1:8080/hello/get
